Concreto Ethnic Floor Spotters - 200 x 200mm
Concreto Ethnic Floor Spotters - 200 x 200mm


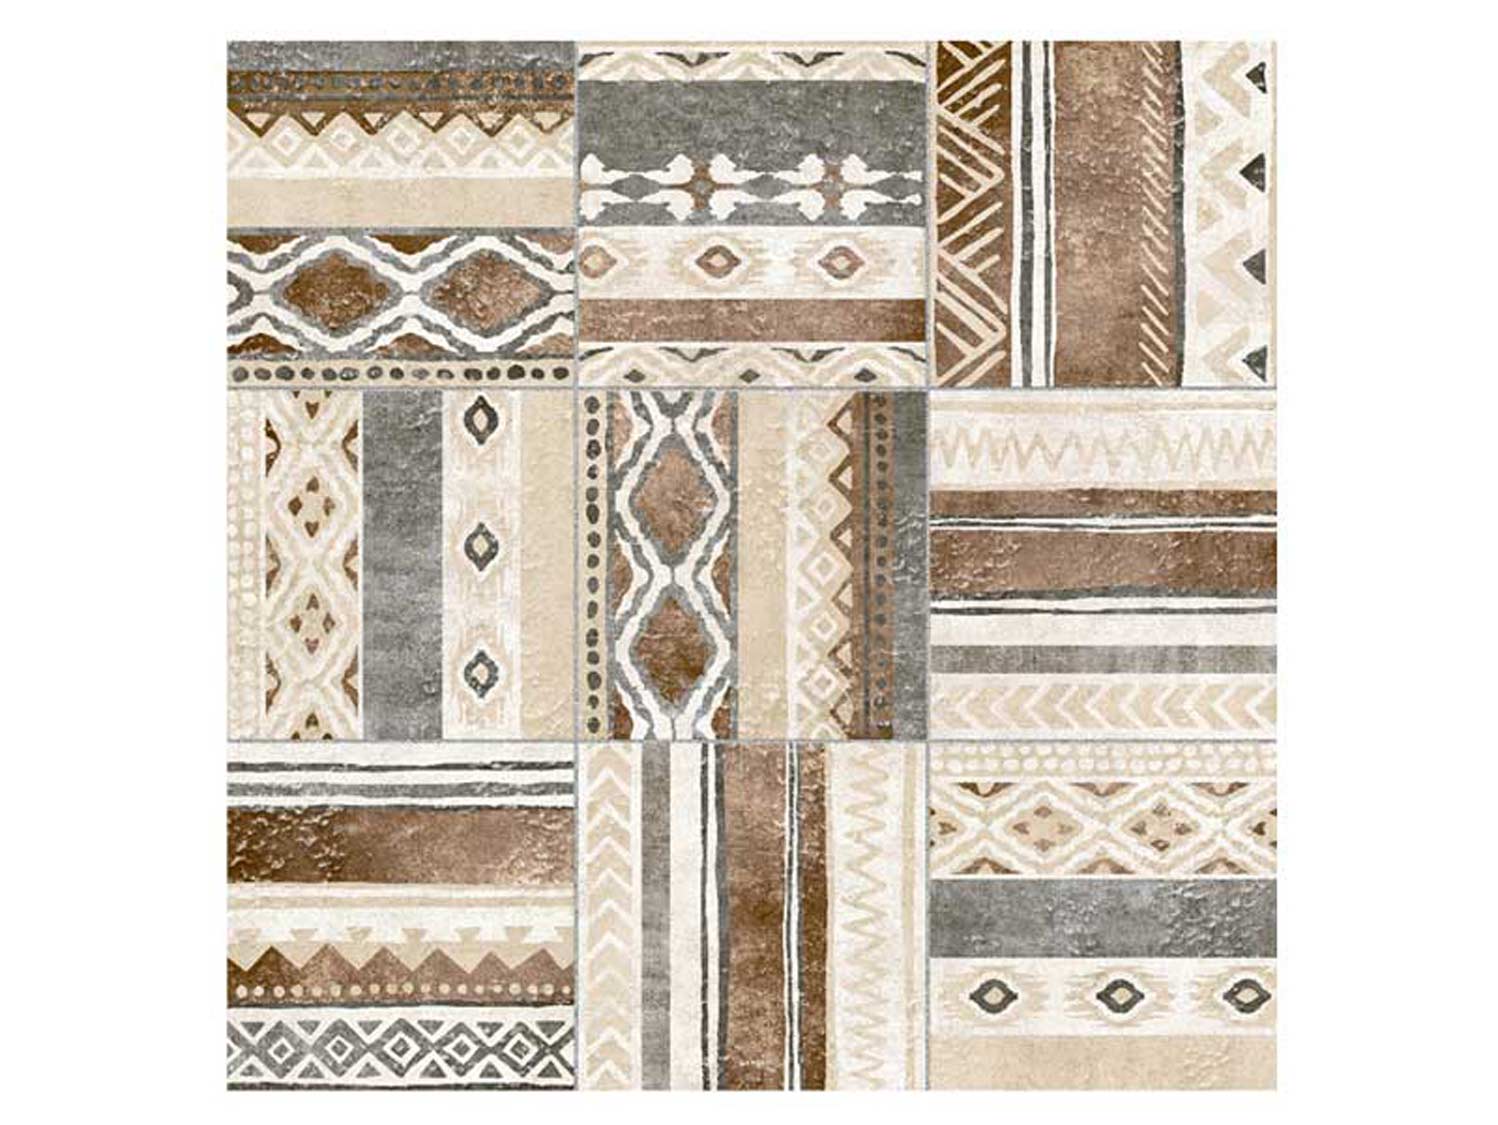
These floor and wall RUG EFFECT spotters / inserts, were designed to bring in the very trendy ‘cement’ finish to the SAFARI CHIC style and look thus adding a touch of modern flair and feel to the traditional rustic ethnic style of bygone years.
The SAFARI CHIC style is based on a celebration of a modernised cultural heritage and an appreciation of one or more particular African cultural styles.
This decorative RUG SPOTTER was largely inspired by culturally significant colours, patterns and original, natural materials.
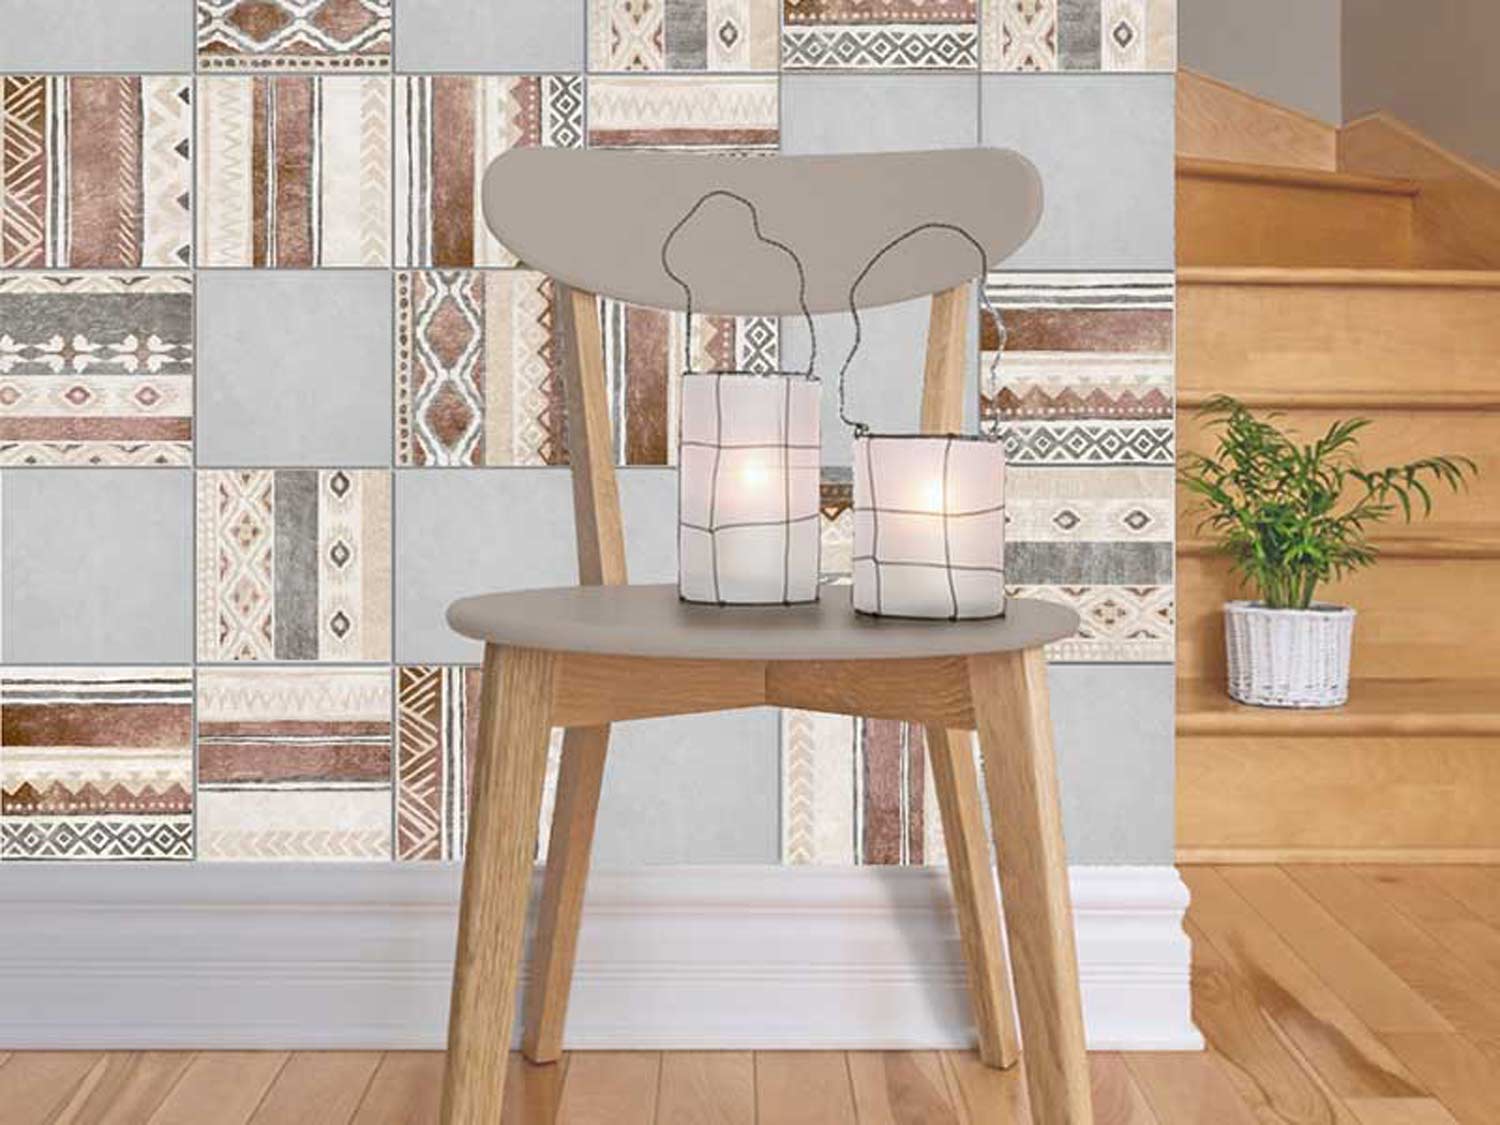
The African inspired patterns as well as the carefully selected colour combinations in this design works well with modern and contemporary upholstered furniture and accessories which once again helps to revive the old and typically rustic ethnic style.
The addition of cement and stone textures in the background reminds us of the raw beauty the African landscape.
The neutral colours in the design (hues of both beige and grey tones = greige) will allow you to easily match to either warm or cool interiors of the room/living space.
This FLOOR RUG SPOTTER is originally printed on a porcelain 600mmx600mm sized tile and then cut into squares of 200mmx200mm for easier tiling and installation.
Therefore, if 9 (nine) of these individual squares are placed together they will fit and match the size of the porcelain full tiles 600mm x 600mm.
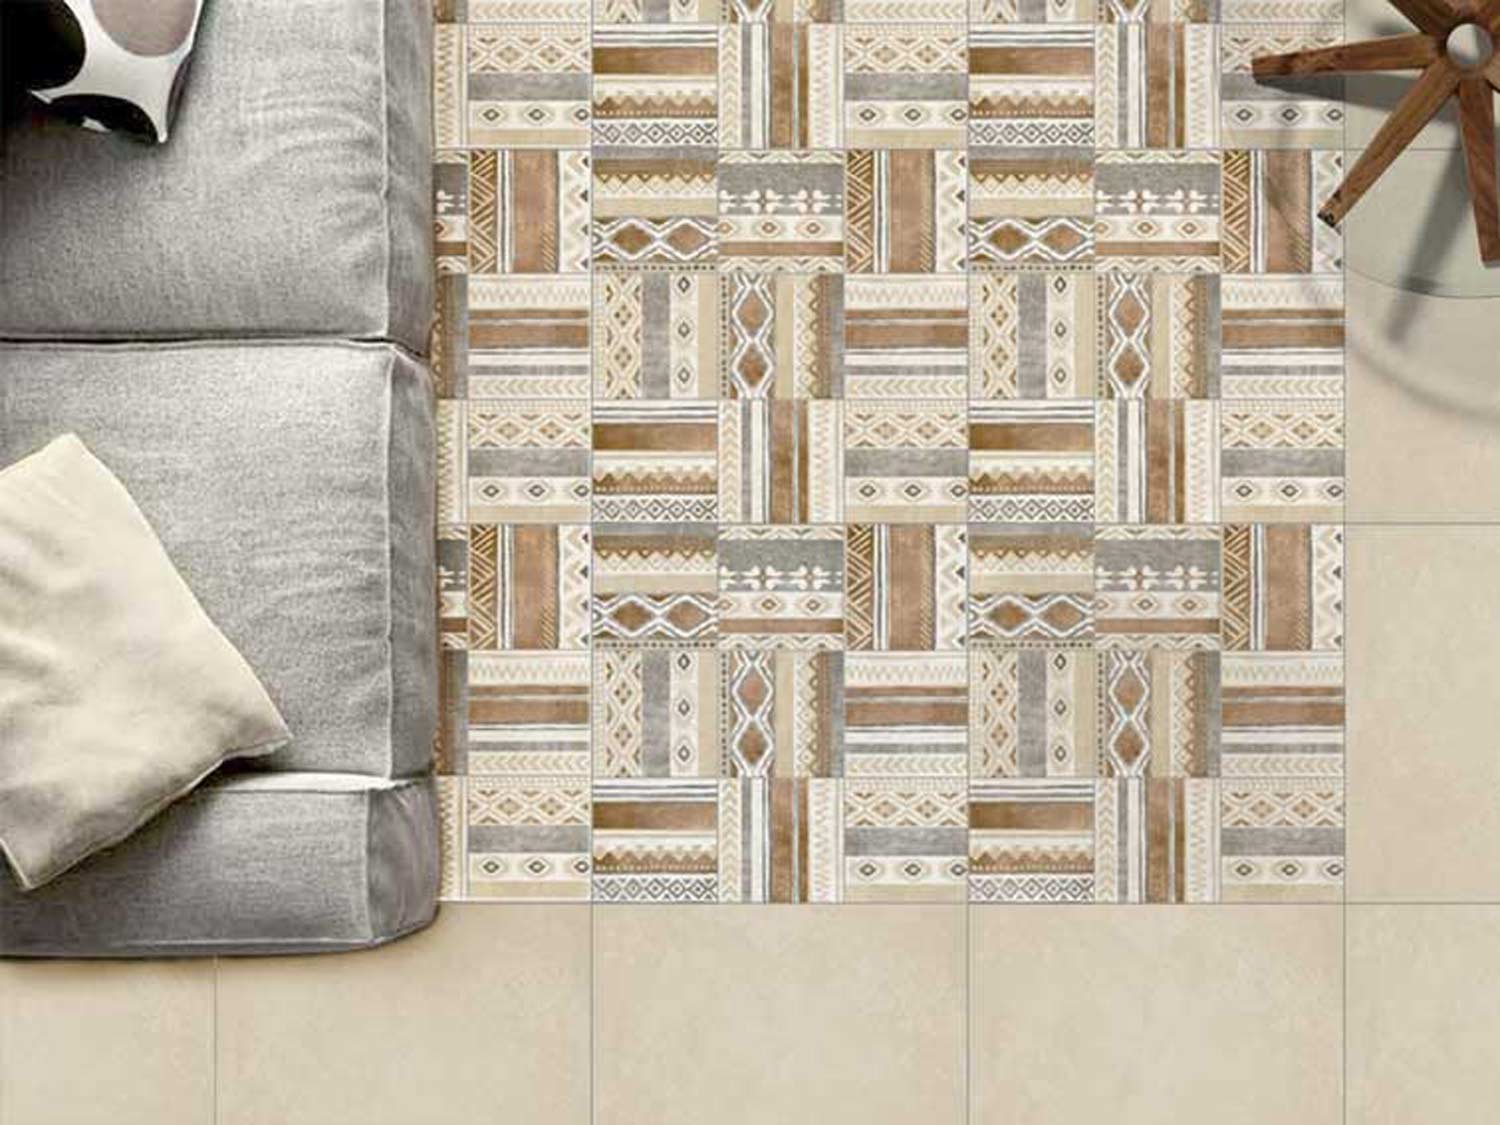
Tile this unique décor tile in your living or entertainment areas creating a RUG/CARPET effect on the floor; OR
Use as individual inserts either on the floor or as cladding to match your floor.
Good for high domestic FLOOR use as well as WALL.
This decorative tile is digitally printed with the latest technology which allows for a realistic imitation of the cement and stone textures.
Once printed, the tile is re-fired/baked allowing for the inks to melt into the glaze of the tile thus making décor easy to clean and maintain.
Tile this unique décor tile in your living or entertainment areas creating a RUG/CARPET effect on the floor; OR
Use as individual inserts either on the floor or as cladding on the wall to match your floor; OR
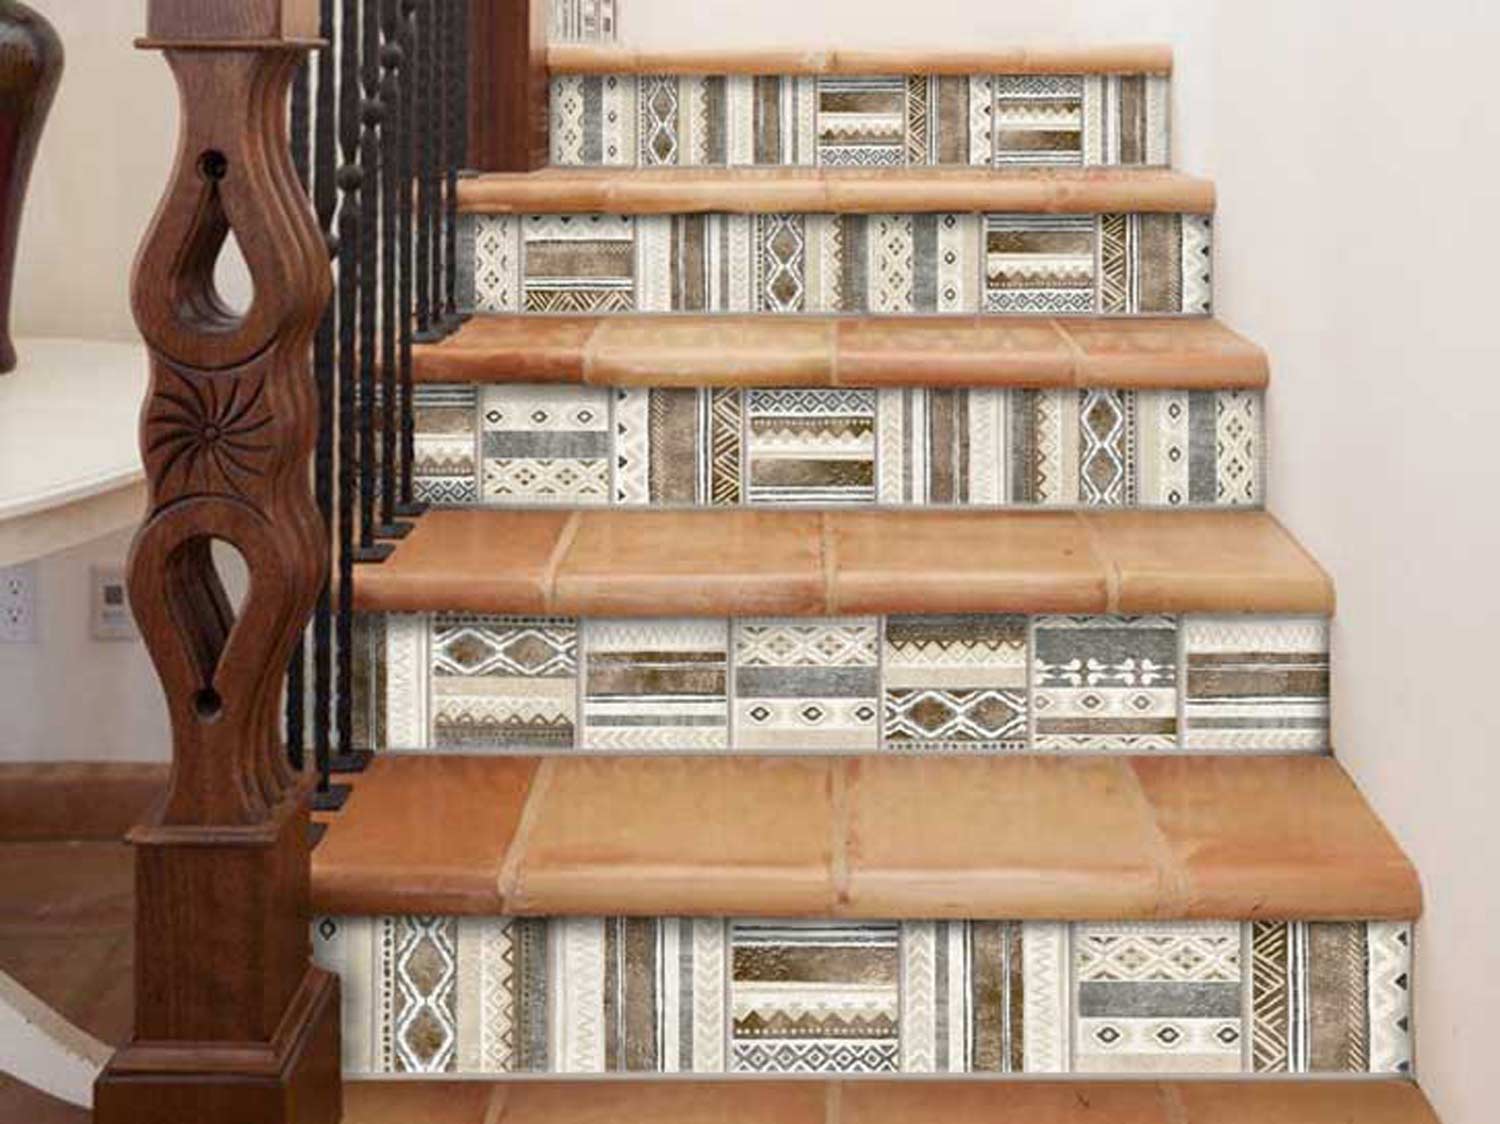
Tile on your ‘uprights’ of your steps/staircase to create an attractive visual focal point; OR
Use as cladding together with plain cement cut tiles for in between kitchen cupboards and counter tops.
A light or dark grey grouting is recommended.
Group 9 of these spotters together in a square to match your full 600x600mm tile.
For a modern feel, use grey grouting in keeping with the trendy cement look.
For a more rustic feel, use brown coloured grouting.
Product Specifications
| Brand | CTM South Africa |
|---|---|
| Tile Type | Ceramic |
| Length (mm) | 200 mm |
| Width (mm) | 200 mm |
| Tile Application | Indoor Wall |
| Finish / Texture | Matt |
| Colour | Other |
| Type | Spotters |


How To Install Mosaic Tiles
- The installation surface must be smooth and clean to ensure proper installation.
- It may be necessary to hack the wall to allow the adhesive to be able to set properly.
- Make sure the wall is dry and dust free before applying the adhesive.

- Measure the space in which the mosaic is being installed to determine the best fit for your tile.
- Use a straight edge and level to help you align the tile as you work.
- Construct a grid on the substrate that is equal to nine sheets of the tile.
Tip : Be sure to account for the spaces between each sheet of tile when measuring. It woudl help to dry lay the mosiac tiles on the floor first for you to see where you will be able to install the tiles with minimum cutting.

-
Mix the Pro Grip White Mosaic Fix adhesive.
First coat: apply setting material with the smooth edge of a trowel to a section no larger than one section of the grid.
Second coat: create even ridges in the setting material by “combing” the material with the notched edge of the trowel
Tip : Do not apply any adhesive to the mosaic sheet
Tip : Do not apply any adhesive to the mosaic sheet.

- Most sheets of mosaic have a clear film covering on the front face of the tile. This allows the mosaic design to be seen during installation.
- Apply the back meshed side of each sheet into the adhesive.
- Using a float tool, tap across the surface to adhere the mosaic securely into the adhesive.
Tip : The space between each sheet of tile should equal the space between each individual mosaic tile. Use a spacer that is of equal size.

- It is important to create a secure bond between the tiles and the adhesive.
- Using the float tool tap across the surface to adhere the mosaic securely.
- This also ensures the final exposed plane of the mosaic is consistent and uniform in height.
- This can be a time consuming process, but is important to ensure a professional installation.
- Adjust while the adhesive is still wet.
- Correct any tiles that are uneven and ensure that all gaps are of equal width and height. Do this by cutting through the clear tape and moving tiles with a small trowel.

- Grout can be applied to a clean, dry surface.
- Before applying grout be sure that the mosaic surface is clean and all clear sheets are removed from the tiles.
- Thorough cleaning may involve removing excess adhesive from the mosaic joint with a knife, as well as cleaning off all dust and particles.
- Spread grout from the bottom up in a diagonal direction using a rubber grout applicator.

- The mosaic should be cleaned after the grouting is complete.
- Use a sponge and clean water and scrub in a circular motion, removing excess grout and smoothing all joints. Continue to wipe down the tiles until clean.

Ready when you are!
Buy Online and we will reserve and pack your order to ensure a speedy collection at your local CTM store. We offer free collections at all our CTM stores countrywide.
Normally, orders will be ready for collection on the same day payment is made and confirmed. For all cheque payments, your order will be processed and dispatched once the cheque is deposited and clears. See all our payment options here.